Public DNS Access Guide
Overview
This document describes how to access Public DNS from your computer system.
Directions
This document provides the following three computer system access methods:
Windows 10
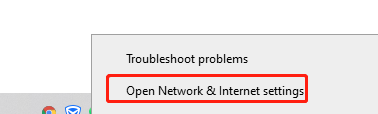
- Click the network connection icon in the bottom-right corner of the taskbar, and then click Network & Internet settings to open the "Network status" page as shown below:
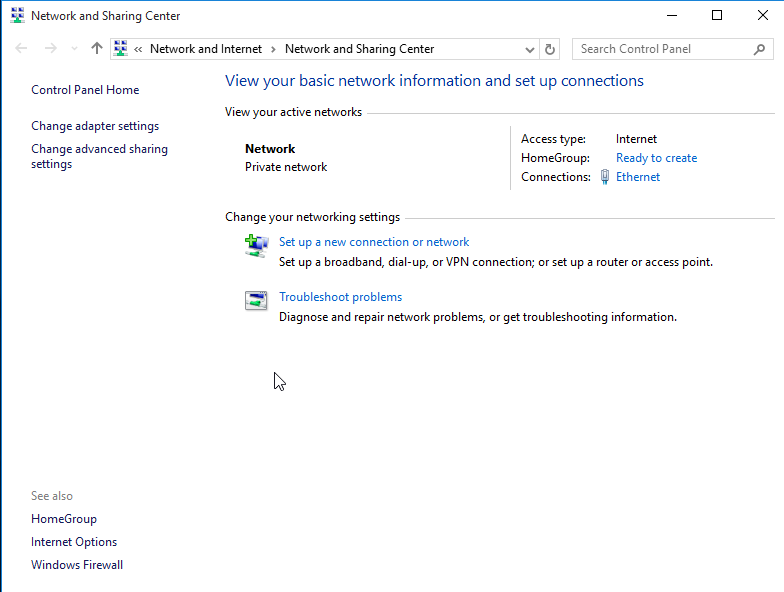
- Click Network and Sharing Center. On the opened "Network and Sharing Center" page, click Ethernet as shown below:
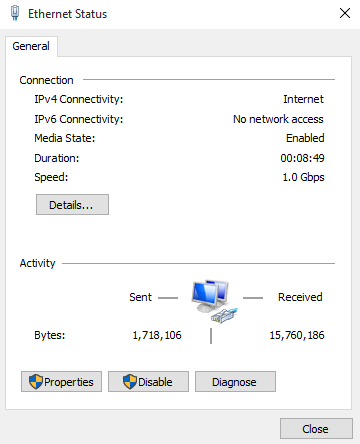
- On the opened Ethernet Status page, click Properties as shown below:
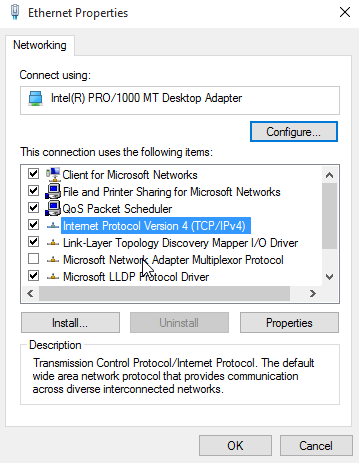
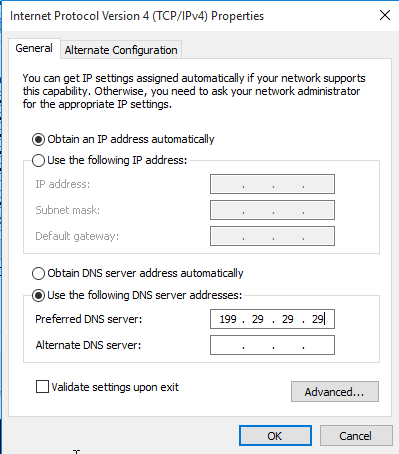
- In the Network tab, under This connection uses the following items:, double-click Internet Protocol Version 4 (TCP/IPv4) as shown below:
-
In the General tab, click Use the following DNS server addresses, and then enter
119.29.29.29in Preferred DNS server as shown below:
-
Click OK to save the change and exit. At this point, you have connected to Public DNS on Windows 10.
Linux
Note:
Please switch to the root user first. In addition, please ensure that the server can access the public UDP and TCP port 53 normally.
The following takes CentOS 7 as an example.
-
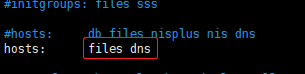
Run the command
vim /etc/nsswitch.conf, modify the following content, save the change, and exit. The following content indicates that the configuration of the/etc/hostsfile will be used first before the DNS record is used.
-
Run the command
vim /etc/resolv.confto configure the preferrednameserveras119.29.29.29, save the change, and exit. At this point, you have connected to Public DNS on Linux as shown below:

Note: if the
nscdservice is enabled on the server, we recommend you disable it or its domain cache feature to avoid exceptions.
How to disable domain cache: run the commandvim /etc/nscd.conf, open thenscd.conffile, and setenable-cache hoststoyes. After making the change, restart thenscdservice.
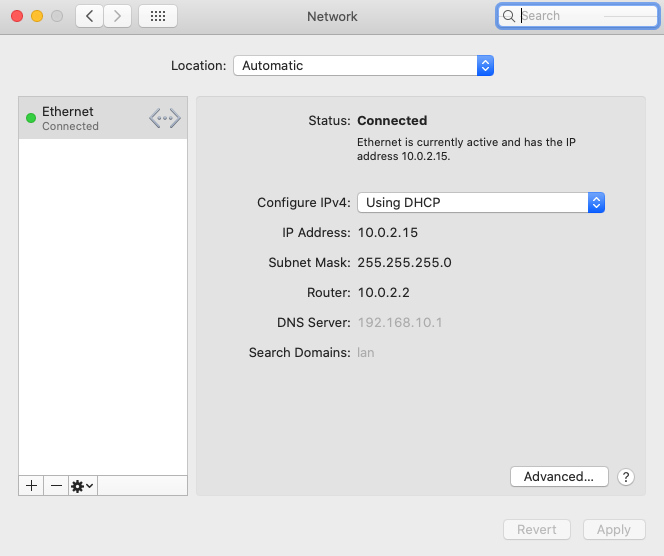
macOS
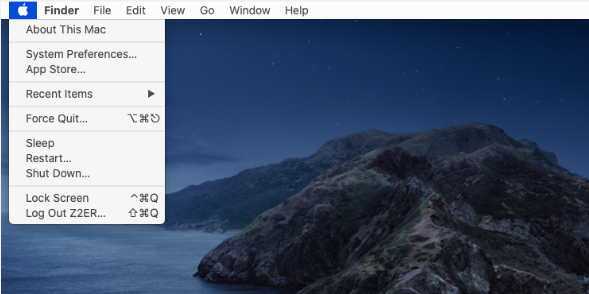
- In the macOS system menu, select System Preferences as shown below:
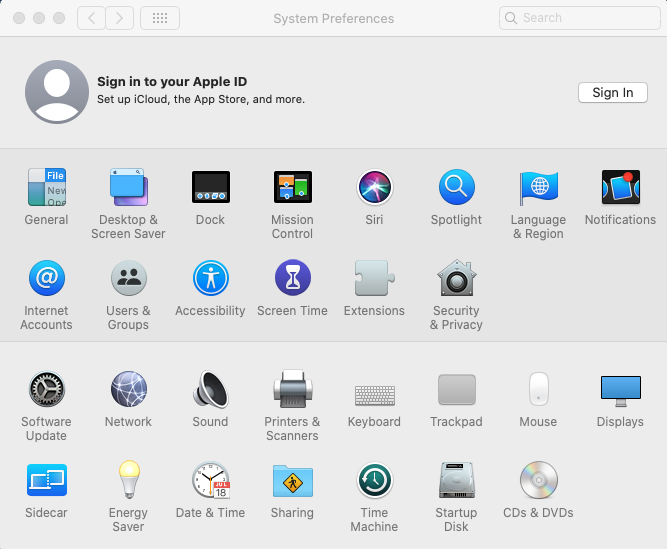
- On the opened "System Preferences" page, click the Network icon as shown below:
- Select the network connection service you want to modify or currently in use (such as Wi-Fi or Ethernet) from the list, and then click Advanced as shown below:
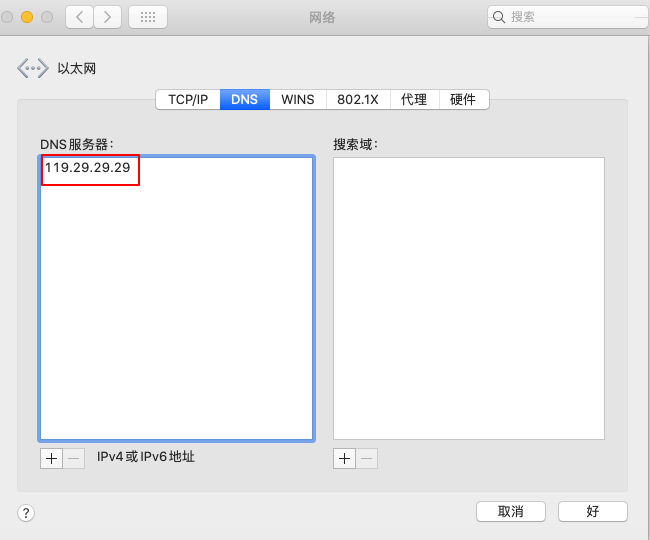
- Select the "DNS" tab, click
+in the bottom-left corner of DNS Server, add119.29.29.29, and click OK in the bottom-right corner. At this point, you have connected to Public DNS on macOS as shown below:
- Can't find what I need
- Update is not timely
- Difficult to understand
- Typo/invalid link
- Steps are incomplete
- Missing images/sample codes

DNS health check tool powered by DNSPod
查询域名信息,快速排查网站问题

Official WeChat group
Join WeChat group to chat and feedback

Scan using WeChat